Showing posts with label diy. Show all posts

Monday, 14 July 2014

DIY : Homemade Lemon Cranberry Scones/Biscuits

Late at night I like to bake...or feng shui...or clean. But it's mostly baking. I'm not completely sure why but something about the house being quiet, and everyone is (assumingly) asleep. I presume for the most part that it's because nobody is bothering me and therefore I get to try new things without interruption. It's kind of therapeutic and I highly recommend it. But I'm not a doctor or anything. 

When 1am rolls around I'm probably laying in bed looking at pictures on the internet of cats doing hilariously stupid things, or over-analyzing a situation which occured during the day that didn't quite go as planned. Don't you just hate that? I'd rather take cats any day. Yet, I had scones on the mind. So I guess that's ok. 

Here's the recipe I followed for basic scones, for which I later added the cranberries and lemon without instruction. I know ... I'm a little risque. If any of you recognize this recipe from the Good Housekeeping cookbook circa way-before-my-time don't get rid of it. I repeat: do not get rid of it. It's probably torn and tattered like mine but this is hands down the best cookbook for e-v-e-r-y-t-h-i-n-g. Trust me, I'm a doctor (seriously I'm not). 


DIY : Lemon Cranberry Scones 
2 cups all-purpose flour (the white stuff)
1 tbsp baking powder
1 tsp salt (Note: I skipped this. I never add extra salt in my food)
1/4 cup of shortening (Crisco)
3/4 up of milk
2 cups-ish of cranberries
2 tbsp of lemon concentrate 


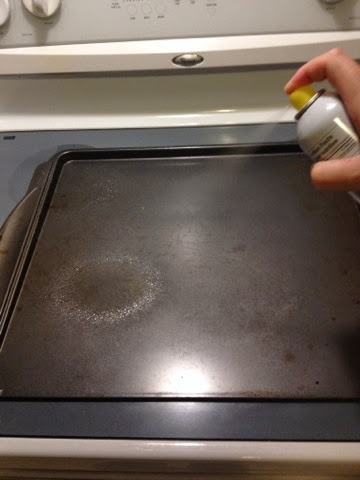
Step 1: Preheat the over so you don't have to wait when you're ready to bake. Then pre-grease a cookie sheet so those bad boys don't get stuck. 


Step 2.: Mix everything with a fork EXCEPT THE MILK. Apparently there's a funny littl trick to making the shortening easier to mix, but honestly I just put it in and went to town on it. Good ol' elbow grease. 

Step 3: Finally add the milk and with the fork give it a good thorough mix. 


Note: I added enough cranberries until I could see them everytime I mixed. It was about 2 cups. For the lemn juice I added 2 tbsp because then I could smell the lemon from the batter. If you're looking for a little extra citrus punch add some orange zest. 


Step 4: Use a spoon with the fork and place them onto the cookie sheet. The batter should be gooey. About 1 inch apart on the sheet. 

Step 5: Place them in the oven approx 12-15 minutes depending on your oven. They don't take long and they should look cripsy and well risen from the outside. You could also -carefully- touch the tops while they're in the oven and if they bounce-back then they're ready. Or stick a fork in them and if they come out dry then you're good to go. 

Step 6: Take them out of the oven and eat those bad boys. I almost want to make more just by typing this out. 


Enjoy and bon appetit! 

-DIYkendra 

Thursday, 5 June 2014

What I'm Trying : Oil Pulling

Oil pulling was originally brought to my attention on the Kitchen Beautician page of The Beauty Departments website. Essentially this page is for the DIY-er who wants to make their own beauty products at home. In my case I'm just poor and think beauty products are radically over charged. But in any case I visit the page regularly and was pleasantly surprised to see a new article on natural teeth whitening. 

Here's a little back story for you folks who don't already know why I'm obsessed with my teeth. When I was 'little Kendra' and teething I caught the chicken pox. This interrupted what should have been my natural teething process and turned it into years of oral-financial stress and endless Ortho/dentist appointments. My two incisors (right beside the two front teeth I believe) didn't come in naturally when the baby teeth fell out, leaving me with gaps. Ever since then I've had veneers attached to a very discreet retainer in my mouth. Anyone meeting me after this point can never tell so I'm pretty happy with the outcome. This can make whitening your teeth a challenge though because the veneers are made to match all your other teeth. 

Here's where the oil pulling comes in handy. Although I receive endless groupons for teeth whitening treatments and see about a half dozen 'New client whitening' ads everyday I still don't feel comfortable chemically forcing my teeth to change colour. I tried a formula last month using Hydrogen Peroxide, water, baking soda, and toothpaste (containing fluoride) but the results just didn't do it for me. So we shall see if the oil pulling technique can walk the walk. 

Here's the website with the steps I followed: 

http://thebeautydepartment.com/2014/03/kitchen-beautician-8/

And here's what I did: 

Step 1: Get coconut oil. Seriously it has almost endless uses and I bought a huge can of it at Wal Mart for $2. You can use to get make up off, as a moisturizer, cooking, hair treatment, etc... It's pretty amazing stuff. 

Step 2: Grab a teaspoon and scoop out a fair share amount of the coconut oil. Because the coconut oil is solid I heated up a mini dish in hot water and let the oil melt into the dish. 


Step 3: Let the coconut oil melt and use the spoon to mash it up. Basically until it's at a liquid consistency. 


Step 4: Ok. Put it in your mouth. It's gross in the beginning but I tell you after 1 minute your own natural saliva kicks in and you don't even notice what's going on. Swish for 20 minutes. 

20 MINUTES. 


Step 5: Spit into a garbage. This is important because coconut oil will cool and harden in your pipes.

Step 6: Rinse your mouth with water and spit into the garbage. 

Step 7: Brush your teeth as normal and don't forget to floss!